Understanding Vapor Barrier Installation
What is a Vapor Barrier?
A vapor barrier is a critical component in home construction, especially in areas prone to moisture. It is a product, often made from polyethylene plastic sheeting, that prevents water vapor from penetrating the walls, floors, and ceilings of a structure. By effectively acting as a moisture shield, vapor barriers play a vital role in maintaining the integrity of a building, safeguarding against mold, mildew, and structural damage.
Importance of Vapor Barrier Installation
The significance of Vapor Barrier Installation extends beyond mere moisture control. A properly installed vapor barrier can increase energy efficiency by preventing condensation that leads to heat loss. Additionally, it helps in preserving indoor air quality, reducing the risk of respiratory issues that can arise from mold exposure. Homeowners who invest in vapor barrier systems also often find improved comfort throughout their living spaces, given the reduced presence of dampness and musty odors.
Key Materials Required
To install a vapor barrier effectively, several key materials are necessary. Typically, this includes vapor barrier sheeting, adhesive tape, and sealants, as well as insulation materials if required. The thickness of the vapor barrier, based on local building codes and the specific location of installation, can also influence material choice. Having the proper tools on hand, such as a utility knife, scissors, a staple gun, and rollers for smoothing out the barrier, is equally important for a successful installation.
Preparing for Vapor Barrier Installation
Assessing Your Crawl Space
Before proceeding with installation, it is crucial to assess the crawl space thoroughly. This evaluation includes checking for existing moisture issues, structural damages, and the general condition of the area. Measurements of the crawl space must be recorded, as this will determine the amount of vapor barrier material needed. It is also important to ensure that there are no obstructions that could hinder extensive layout coverage.
Cleaning and Insulating the Area
Once you have assessed the crawl space, the next step is to clean and insulate the area. Remove any debris, old insulation, or materials that could trap moisture. Ensuring proper drainage and ventilation within the crawl space may also be necessary. After cleaning, insulation can be added to improve energy efficiency and further control moisture, as an effective insulated space provides better resistance to condensation.
Measuring and Sizing the Barrier
Measuring the crawl space accurately is indispensable for obtaining the right size of vapor barrier. Consider the following key dimensions: length, width, and height of the area. When ordering or cutting your vapor barrier, it is advisable to add a few extra feet to cover overlaps and seams. This preparation minimizes the chances of gaps that could allow moisture ingress later on.
Step-by-Step Guide to Vapor Barrier Installation
Gathering Necessary Tools
Having the right tools ready before starting the installation is vital for efficiency and effectiveness. Key tools include a utility knife, scissors for trimming the barrier, measuring tape, a staple gun for securing the barrier, and a roller to smooth out the material. Additionally, having safety gear such as gloves and a mask is important to protect against dust and irritants commonly found in crawl spaces.
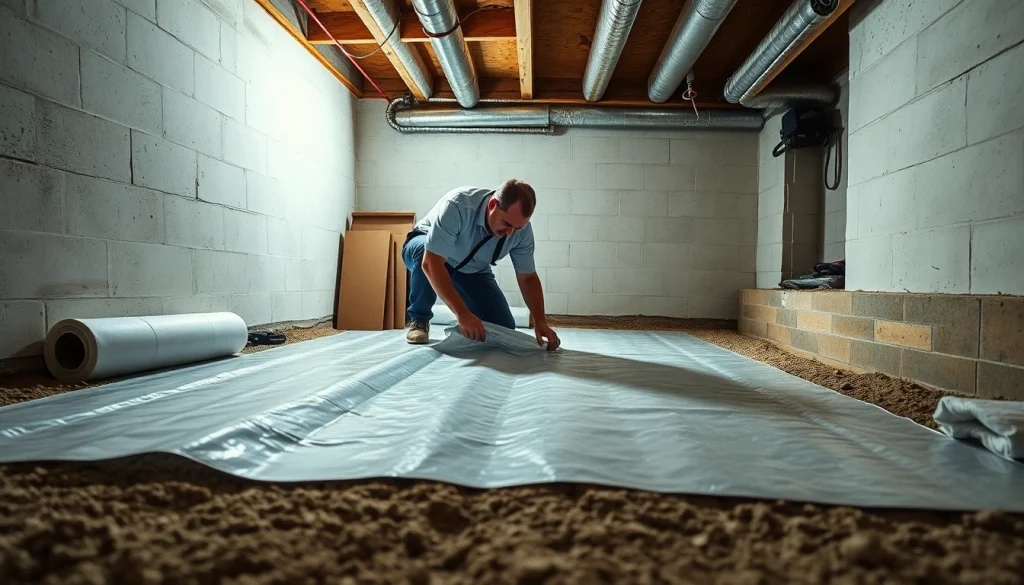
Applying the Vapor Barrier
Begin the installation process by laying the vapor barrier down in the crawl space. Ensure that the barrier covers the entire ground and overlaps any edges significantly. As you apply the barrier, use weights or adhesive tape to hold it in place where necessary. If walls are also included in your installation, the vapor barrier should extend at least 6 inches up the wall. This is essential in providing a continuous moisture barrier around all surfaces.
Sealing and Finishing Touches
After applying the vapor barrier, sealing the edges is the next crucial step. Utilize waterproof tape to secure all seams and edges, ensuring there are no potential weak points where moisture can enter. If necessary, apply additional sealant to areas where the barrier meets walls or foundations. Finally, perform a thorough inspection to ensure that the entire surface is smooth, with no wrinkles or loose edges that might compromise the moisture barrier’s effectiveness.
Common Challenges in Vapor Barrier Installation
Dealing with Moisture Problems
Moisture problems can be a prevalent obstacle when undertaking a vapor barrier installation. Identifying the source of moisture before installation is crucial. This may involve checking for leaks in plumbing, poor drainage issues around the home, or groundwater management. Proper grading around the foundation can alleviate many moisture issues, making the vapor barrier more effective once installed.
Ensuring Proper Sealing Techniques
Improper sealing can lead to substantial issues in vapor barrier effectiveness. Use high-quality vapor barrier tape when securing seams, and ensure all overlaps are adequately sealed. Employing the right sealing techniques is essential as poorly sealed barriers can leave gaps that allow moisture to seep through, nullifying the entire purpose of installation.
Overcoming Accessibility Issues
Crawl spaces can often be tight and awkwardly shaped, creating accessibility issues during installation. Utilize flexible tools such as inspection cameras to view hard-to-reach areas. If the space is too confined, consider enlisting a partner for help, or consult with a professional who can provide additional expertise in navigating tight confines.
Maintaining Your Vapor Barrier
Regular Inspection Tips
Maintenance of your vapor barrier is essential to ensure it continues to perform adequately. Regularly inspect the barrier for tears, holes, or signs of moisture infiltration. These inspections should occur at least twice a year and following significant weather events. Attention to detail during these checks helps catch minor issues before they develop into major problems.
Signs of Damage to Watch For
Key signs of damage may include the presence of mold on the barrier, unusual moisture levels in the crawl space, or structural issues that indicate seepage. Additionally, musty odors or the appearance of pests can also signal problems. Quick detection and resolution of these signs can mitigate long-term damage to both the vapor barrier and the structure itself.
When to Seek Professional Help
While many homeowners can successfully install and maintain their vapor barriers, some situations may necessitate professional assistance. If you encounter extensive moisture issues, structural damage, or are unsure about the correct installation process, consulting with a qualified contractor can provide peace of mind and ensure job quality. Additionally, professional assessments can identify underlying problems not visible during the initial installation process.
Frequently Asked Questions
1. Why is a vapor barrier important?
A vapor barrier prevents moisture from entering a space, protecting against mold, mildew, and structural damage, and improving indoor air quality.
2. How thick should a vapor barrier be?
Typically, a vapor barrier should be at least 6 mil thick; however, local codes may specify thickness, so always check before installation.
3. Can I install a vapor barrier myself?
Yes, many homeowners can install a vapor barrier on their own with the right tools and knowledge, although professional help can ensure better results.
4. How often should I check my vapor barrier?
Regular inspections should occur at least twice a year and after heavy rainfall or flooding to ensure it’s intact and functioning correctly.
5. What are common mistakes during installation?
Common mistakes include improper sealing, inadequate cleaning before installation, and measuring errors that lead to gaps in the barrier.